

This post is structured as follows.
- Before we start: A quick video using Kendo grids in MVC
- Step 1 – Creating a Kendo UI Project (Optional)
- Step 2 – Creating A Kendo Grid
- Step 3 – Embedding the Kendo Drop-down List
- Nullable Model Properties – How to Take Care
- You are done with integrating a Kendo drop-down list inside a Kendo grid
This post will guide you through the following:
- Build a Kendo grid using the MVC razor wrappers
- Integrate an inline drow down list in an editable column
- Solve saving nullable model properties bound to drop down menus inside the Kendo grid on both create and edit events
Telerik Kendo Controls makes things pretty easy for both UX and UI developers as well as those who are using technologies such as ASP.NET MVC or other similar ones.
This article illlustrates how the Kendo drop-down lists can be integrated into Kendo grids and used to advantage by programmers.
Having a Kendo grid drop-down column in MVC is frequently used by web developers in the inline-editing mode of the grid.
You might also be interested in ASP.NET MVC DropdownLists where I explained in 3 steps how to create MVC DropDownLists with the least efforts using a straightforward data source, Razor helper, and a single Bootstrap CSS class.
Note: This assumes that the person reading this post has a reasonable knowledge of ASP.NET MVC, Kendo UI (razor wrappers), as well as the related terminologies.
This article details in a step-by-step manner as to how to integrate the two options in a smooth way using Kendo wrappers.
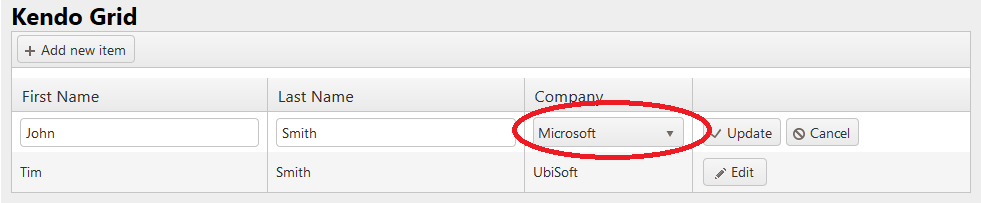
(Figure 1: Kendo dropdown list included in the Kendo grid)
Before we start: A quick video using Kendo grids in MVC
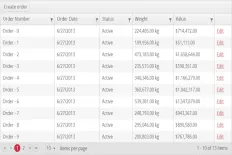
It might be useful to have a quick overview of how to build Kendo grids in MVC and compare them with traditional grids in ASP.NET to outline the differences and the out-of-the-box features granted when dealing with Kendo
Now let's move on to creating the Kendo grid with MVC code and how to add a dropdown list in inline editing mode in just three steps.
Step 1 – Creating a Kendo UI Project (Optional)
Firstly, install Kendo UI on your development server in case you have not already done so. If you have not yet done so, go to Kendo Downloads and install the version of your choice.
Soon after, Kendo UI will introduce a few project templates by default in your Visual Studio. Those project templates can help you to create any project with the ease that has Kendo UI integrated into it by default.
Figure 2 displays some of those project templates that are automatically installed by Kendo UI.
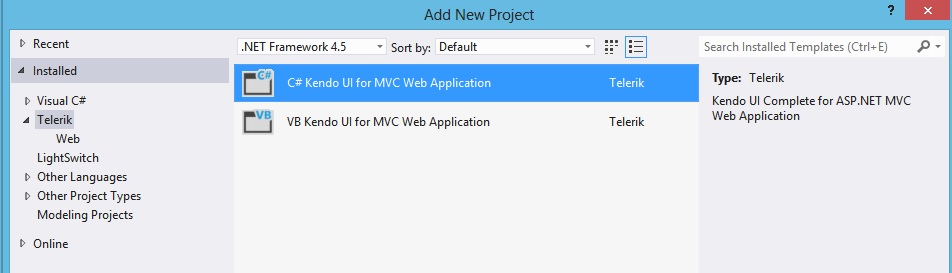
(Figure 2: Kendo UI – Project Templates Installed)
Step 2 – Creating A Kendo Grid
After creating a Kendo project (using the default templates of your choice) the next job is to use the Kendo grid MVC razor wrappers to create the views that your project requires. The Kendo grid can be used thus using the following razor wrapper (relevant code is below).
and include the following JavaScript code in a script tag <script type="text/javascript">
Snippet 1: consists of a grid that contains the employee details such as the employee first name, employee last name, and the name of the company. The definition of the Employee class follows:
Snippet 2: Employee class
This class of the following fields: employee id, employee first name, employee last name, company id, and company name. These class properties have columns in the Kendo grid with the same names as in the code.
The data corresponding to this code is gathered using any framework from a data repository (It is outside the premise of this article to elaborate more on this). The code that follows this section presents the data to the data source.
However, you should bear in mind that the code must retrieve the field "CompanyName" for every employee. (The code listed below only serves as an example. You should replace this with your code to get the job done.)
Snippet 3: Employee data
Step 3 – Embedding the Kendo Drop-down List
The next step involves populating the Kendo drop-down list with the company names. This stage will help the user to select a company name from those that appear in a drop-down menu when he chooses either the create mode or the edit mode of the grid.
The user then selects the company that corresponds to that the specific employee. The code that binds the column to CompanyId is shown below as point (1.). It can be seen in the Kendo MVC Grid creation step as well. Point (2.) explains how the code executes.
1. Ajax action that returns JsonResult and the drop-down binding in the grid
Snippet 4: The above piece of code should be inside the controller
Snippet 5: The above piece of code should be in Kendo grid in the view
2. The explanation for the above code is as follows:
TheEditorTemplateName specifies to the grid that when either in Create or Edit modes, the template should be placed in the data file named "CompaniesList" that you can find in the directory by the name of EditorTemplates. The subsequent step therefore involves the creation of a folder by the name of
"EditorTemplates" and place an empty view in it by name of "CompaniesList". The code bit
"ClientTemplate(“#:CompanyName#”)" means that when the display is in the view mode, (that is, not creating or editing) CompanyName has to be displayed (in this case, it is "Microsoft"). Once this is complete, all that remains that you can do is the creation of drop-down list which will be used in the view. The
ViewBag.Companies dynamic property provides the data to the drop-down list. However, this has to be added to the code as shown below:Snippet 6: The drop-down editor template
The above snippet should be in a separate view in "EditorTemplates" folder with the same name given to the EditorTemplateName in snippet 5 which is "CompaniesList".
You should take care while writing the code for creating the Kendo grid, the most critical point being the statement Name(“CompanyId”). This name helper CompanyId should be the same as the column name that the drop-down is bound to in the grid. In this specific example, the field to which column is bound to is shown as "CompanyId", and this should be the name of the drop-down.
Snippet 7: drop-down list data as companies
and the GetAllCompanies() method will be something like this. (You should replace this method with your own)
Snippet 8: companies data
Nullable Model Properties – How to Take Care
If your model contains nullable properties of types integer, float or byte, it is not possible for the Kendo grid to update model properties to desired values during Create or Edit events.
Nullable properties can create bugs in the drop-downs. Therefore, if the field CompanyId is Nullable<int> instead of just int, then you may have to add code to save this event (to the grid) as follows:
Snippet 9: Kendo grid save event callback registration
Here, EmployeesGrid_Save will take care of the save event (JavaScript handler). The following save handler function will assist in keeping the values of the drop-down to corresponding nullable properties.
Snippet 10: Kendo grid save event callback implementation
You are done with integrating a Kendo drop-down list inside a Kendo grid
Now you have done everything, just build your project and check the Kendo MVC grid in inline mode, while creating or editing, with the Kendo drop-down list integrated.
Read Next
The following articles are related to kendo ui drop down inside kendo grid mvc in 3 steps.


This seems excellent- but i cannot translate it to the HTML5/JQuery version of the grid/dropdown :( Do you have any advice for getting the dropdown value therein? Thanks, Mike
Thanks for your comment - Due to the huge requests to that topic I will be posting a new article about it and will modify this post to link to it in the "related posts" section and will reply to your comment again with the new post URL.
Thank you so much for this article! The explanation of how to update a nullable int in the dropdown really helped me out a lot.
I know this is late but thank you and I'm glad it helped
If Company Id has to be made mandatory in kendo grid what i have to do i have added the below line but still i can add new row, changes other values and validation message is not thrown when i switch to other column: [Required(ErrorMessage = "CompanyName is required")] public int CompanyId { set; get; }
Thank you for that demonstration on creating the Employees list. I saw I could use that to add custom values to my model's properties, like when returning ones from a SQL view I did not want to update. I converted the list using .ToDataSourceResult(), then sent that back in the "return Json(employees);" at the end of the update and it worked great. Thanks for the insight.
it's one of the grid events like the error event in .Events(events => events.Error("error_handler")). You can just add the save event to the grid the same way like .Events(events => { events.Error("error_handler"); events.Save("save_handler"); })
how to get this event Events(events => { events.Save("EmployeesGrid_Save"); })
is this in the grid's edit mode or in display mode?
I have a dropdown in a grid which has the product list and i want to display the product description as soon as you select the product from the dropdown. how can i achieve this.