React Native has become one of the most popular frameworks, and also the easiest to learn, to build elegant world-class mobile applications.
Building native apps is a crucial skill that any developer would love to acquire since native applications are much more performant and responsive than the other web view apps that are actually web apps rendered inside a web view container in a mobile app on your device.
This post will walk you through adding a dropdown list to your React Native project, and the final output of this post will look like something similar to the following
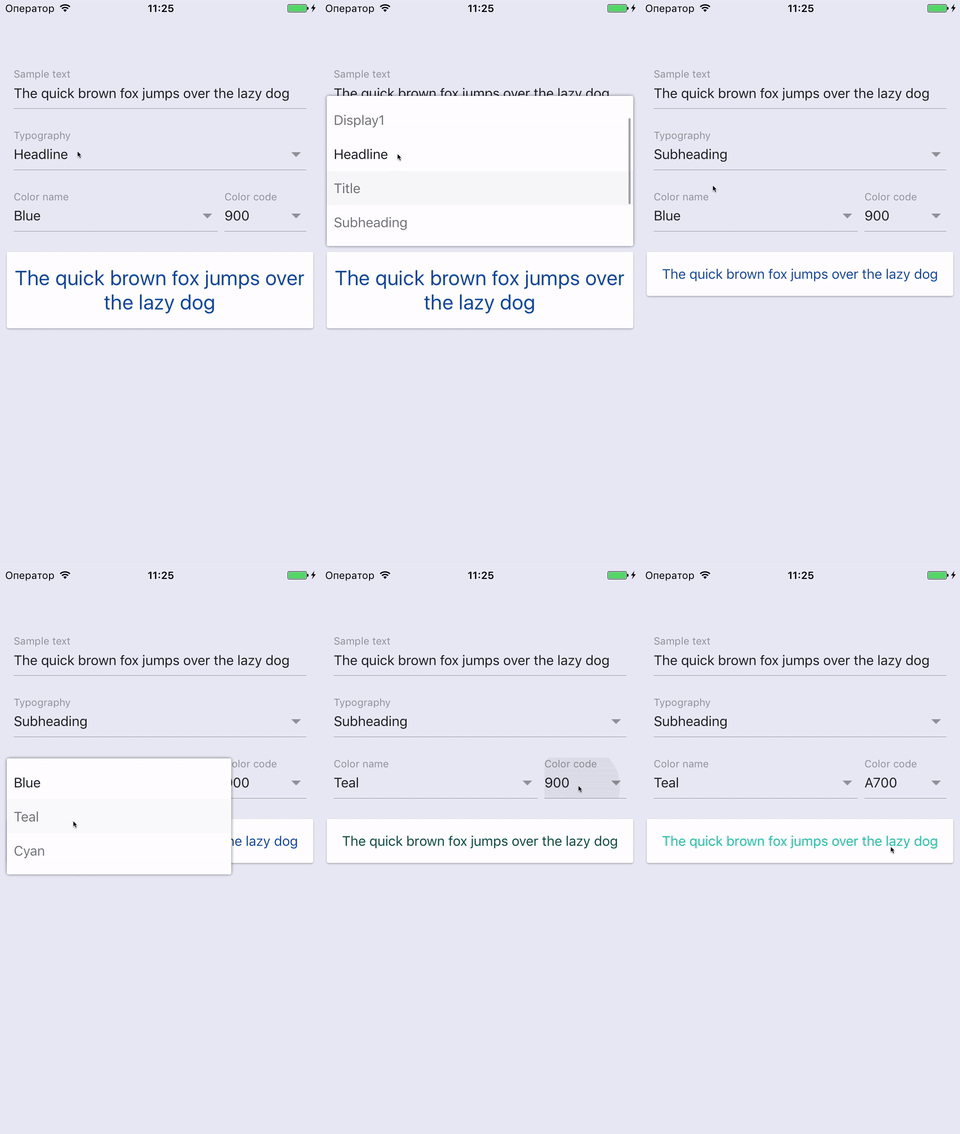
Reference: https://github.com/n4kz/react-native-material-drop...
The three steps of adding a drop-down will be as simple as:
- First step: Add the React Native drop-down node package using NPM
- Second step: Import the react-native-material-dropdown into your component
- Third step: Implementing the code that will render the drop-down
React Native is also a cross-platform mobile application framework that builds apps for both iOS and Android with a single code base, and this post will focus on adding a drop-down list to your React Native project in very few easy steps without going into many complexities.
In order to continue reading this post, you should be familiar with the following:
- React Native development.
- React Native CLI.
- Node JS.
- Git
First step: Add the React Native drop-down node package using NPM
Assuming you created a React Native project, and you are looking to add a drop-down list to it, then the first step is to add the drop-down node package to your project.
First, on your command prompt, navigate to your React Native project root directory where your package.json file resides then type in the following command:
After successfully executing this command, the react-native-material-dropdown should be now saved in your package.json file. Saving this package as a dependency in your package.json file means that other developers working on the same project will be able to install that package in their node_modules after you commit that change and push it to the remote repository.
Second step: Import the react-native-material-dropdown into your component
Once you have installed the dropdown node package, Now it's time to import it into the component that will display that drop-down. To import the package, add the following line of code at the top of your component code
Now you're ready to actually call the Dropdown imported component.
Third step: Implementing the code that will render the drop-down
This step is the actual one that will call the Dropdown imported component into your code. First, let's create a new method that just returns a Dropdown instance as shown below
In the above code snippet, the renderDropdown function returns an instance of a dropdown that will be then used in the component's render method. The drop-down expects the following:
- A label: that will be rendered as a placeholder text inside the dropdown that represents the type of input that's expected from the user.
- data: the list of items that will be displayed as your dropdown select items. In order to let the dropdown understand those items, the format of the list must be an array of JSON objects, as shown in the below screenshot.
- containerStyle: used to apply any custom styles that you'd prefer to apply to the dropdown container.
- onChangeText: an event that is fired any time the selected item is changed, and apparently it's used to set the selected item in the local state of your component.
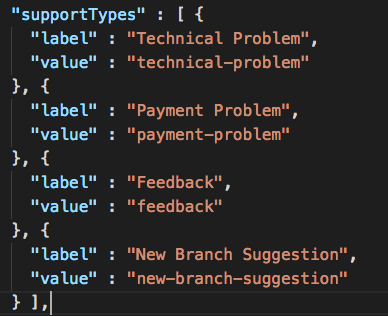
Note: The above code snippet is just an example of consuming the Dropdown imported instance. In your project, you might need to supply different values or provide some data coming from an external REST service or a remote file but since this post is only focused on how to add the dropdown to your component, you should add the necessary code that will provide this data to the dropdown.
Now that you understand how to consume the Dropdown imported instance, you should now call the renderDropdown inside your component's render() function, and it's as easy as adding the following code to your render() method
You should also note that your "render()" function will be different from the one provided in the above example. You should correctly position your dropdown in the right place that would make sense in your app using the containerStyle and the render function JSX markup.
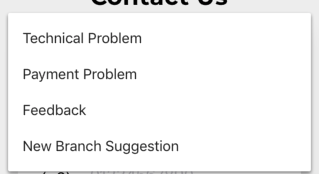
Finally, your dropdown should look something similar to the below screenshot.

And when you tap the drop-down, it should open like the following screenshot.
Putting it all together
A full code snippet containing the necessary minimal code to render the dropdown should look like the following code
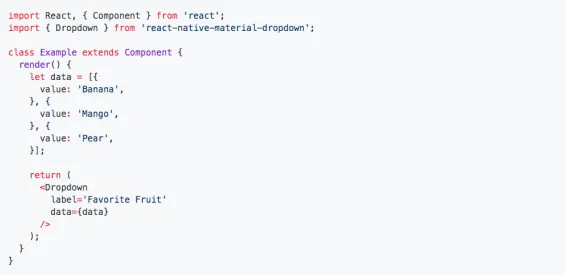
Reference: https://github.com/n4kz/react-native-material-drop...
Read Next
The following articles are related to 3 steps to add react native dropdown list to your project.


